

🧠 Orochi — A modern, distributed web interface for collaborative memory forensics built on Volatility 3, Django, and Dask.
- About Orochi
- Fastest Way to Try Orochi
- Architecture Overview
- Getting Started
- Documentation
- Community
- Contributing
- Origin of the Name
Orochi is an open-source framework for collaborative forensic memory dump analysis.
It lets multiple analysts upload, analyze, and correlate memory dumps simultaneously via an intuitive web interface.
If you just want to get hands-on immediately:
git clone https://github.com/LDO-CERT/orochi.git
cd orochi
sudo docker-compose up
Then open https://localhost and log in with:
Username: admin Password: admin
At first run, Orochi will need to download Volatility plugins and symbol files.
You can do this directly from the Admin Page or by running the management commands described below.
Orochi combines the power of Volatility 3 with distributed task management and a modern web stack:
- 🧩 Volatility 3: Memory forensics framework for extracting digital artifacts.
- ⚙️ Dask: Parallel computing library that distributes plugin execution across workers.
- 🗄️ PostgreSQL: Database for user and analysis metadata.
- ✉️ Mailpit: Local SMTP service for user registration emails.
- 🧱 Django WSGI / ASGI: Core web backend, including real-time WebSocket updates.
- 🔁 Redis: Message broker and cache for asynchronous communications.
- 🌐 Nginx: Reverse proxy providing HTTPS termination.
- 🐳 Docker Compose: Orchestrates the entire Orochi stack for both x64 and arm64 platforms.
flowchart TB
  %% Orientation: Top -> Bottom

  %% Frontend (visible label)
  subgraph FRONTEND[Frontend]
    direction TB
    client["Client (Browser)"]
    nginx["Nginx (Reverse Proxy)"]
  end

  %% Application Layer
  subgraph APP[Application Layer]
    direction TB
    wsgi["Django WSGI (REST / Pages)"]
    asgi["Django ASGI (WebSockets / Realtime)"]
  end

  %% Core Services
  subgraph CORE[Core Services]
    direction TB
    postgres["PostgreSQL (Primary Datastore)"]
    redis["Redis (Cache & Channels)"]
    mailpit["Mailpit (SMTP for Sign-up)"]
  end

  %% Distributed Execution
  subgraph DASK[Distributed Execution]
    direction TB
    scheduler["Dask Scheduler"]
    worker1["Dask Worker 01 (Volatility 3)"]
    worker2["Dask Worker 02 (Volatility 3)"]
  end

  storage["Uploads Storage (/media/uploads)"]

  %% Ingress
  client -->|HTTPS| nginx
  nginx --> wsgi
  nginx --> asgi

  %% Database access
  wsgi <-->|auth, metadata, results R/W| postgres
  asgi -->|state / R/W| postgres

  %% Redis roles
  wsgi -->|cache| redis
  asgi -->|channels| redis

  %% Email (SMTP)
  wsgi -->|SMTP| mailpit

  %% Task submission & execution
  wsgi -->|submit tasks| scheduler
  scheduler --> worker1
  scheduler --> worker2

  %% Files
  wsgi <-->|upload/download| storage
  worker1 <-->|read/write| storage
  worker2 <-->|read/write| storage
  worker1 -->|store analysis results| postgres
  worker2 -->|store analysis results| postgres
Orochi supports multi-architecture builds for both x64 (amd64) and arm64 systems (e.g., Apple Silicon).
git clone https://github.com/LDO-CERT/orochi.git
cd orochiSet your environment configuration in .envs/.local/.postgres:
POSTGRES_HOST=postgres
POSTGRES_PORT=5432
POSTGRES_DB=orochi
POSTGRES_USER=debug
POSTGRES_PASSWORD=debug
And .envs/.local/.django:
USE_DOCKER=yes
IPYTHONDIR=/app/.ipython
REDIS_URL=redis://redis:6379/0
DASK_SCHEDULER_URL=tcp://scheduler:8786
💡 Tip: You can adjust the number of Dask workers in
docker-compose.ymlby editing thereplicasvalue under the worker service.
To pull prebuilt images:
docker-compose pullOr build locally:
docker-compose builddocker-compose upCheck the running containers:
docker ps -aExample output:
NAME                 IMAGE                                COMMAND                  SERVICE       STATUS
orochi-worker-2      ghcr.io/ldo-cert/orochi_worker:new   "/usr/bin/tini -g --…"   worker        Up 5 weeks
orochi_nginx         ghcr.io/ldo-cert/orochi_nginx:new    "/docker-entrypoint.…"   nginx         Up 2 weeks (healthy)   0.0.0.0:443->443/tcp
...
Once the containers are running, Orochi will be available at:
🔗 https://127.0.0.1
docker-compose run --rm django python manage.py plugins_sync
docker-compose run --rm django python manage.py symbols_sync
⚙️ These commands can also be executed directly from the Admin page if new plugins or symbols are available.
- Register a user via Sign Up
- Log in with your credentials
- Upload a memory dump (supports
.raw,.mem, and zipped files) - Choose the OS and optional color label
- Orochi automatically runs the enabled Volatility plugins in parallel via Dask
- View results, compare dumps, and bookmark findings
Default URLs:
| Service | URL |
|---|---|
| Orochi Homepage | https://127.0.0.1 |
| Admin Panel | https://127.0.0.1/admin |
| Mailpit | http://127.0.0.1:8025 |
| Dask Dashboard | http://127.0.0.1:8787 |
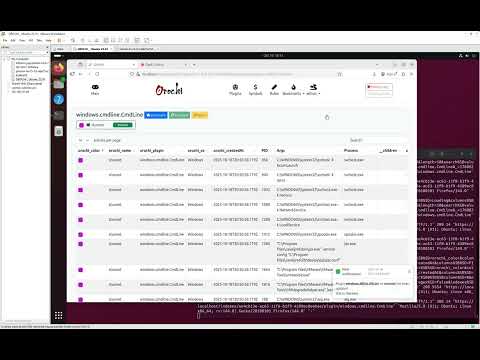
Watch a complete 15-minute setup and walkthrough showing how to install, configure, and use Orochi.
Guide Timestamps:
- 00:00 ➡️ Introduction: Cloning the GitHub repository
- 00:30 ➡️ Docker Launch: Starting Orochi with
docker-compose up - 03:00 ➡️ Platform Access: Opening the web interface
- 03:35 ➡️ Admin Configuration: Downloading plugins & symbols
- 04:00 ➡️ Dask Monitoring: Observing parallel analysis tasks
- 05:20 ➡️ Memory Dump Upload: Uploading and analyzing a file
- 10:45 ➡️ Download Process: Retrieving dumped artifacts
- 12:15 ➡️ Regipy Plugins: Viewing parsed registry data
- 12:40 ➡️ Hex Viewer: Navigating memory data in hex
- 14:35 ➡️ Bookmarks: Saving and revisiting filtered results
Join discussions and get help on Gitter.
We welcome questions, feedback, and new ideas to improve Orochi!
💡 Tip: You can also open GitHub Discussions or Issues directly in this repository.
We love community contributions!
Please review the Contributing Guidelines and Code of Conduct.
🧩 Pull requests are welcome — from typo fixes to new integrations and plugin improvements.
"Its eyes are like akakagachi, it has one body with eight heads and eight tails. Moss and cypress grow on its back, its belly is constantly bloody and inflamed."
Read the full legend on Wikipedia →
🗡️ Let's go cut tails and find your Kusanagi-no-Tsurugi!
© 2025 LDO-CERT — Collaborative Memory Forensics Platform